Users will note that the “Base Application Form” is separated into two parts. Part 1 will cover questions 1-37 of the form, and Part 2 will cover questions 38-53.
To begin the Base Application Form, users should select the blue pencil icon next to the form they want to work on.
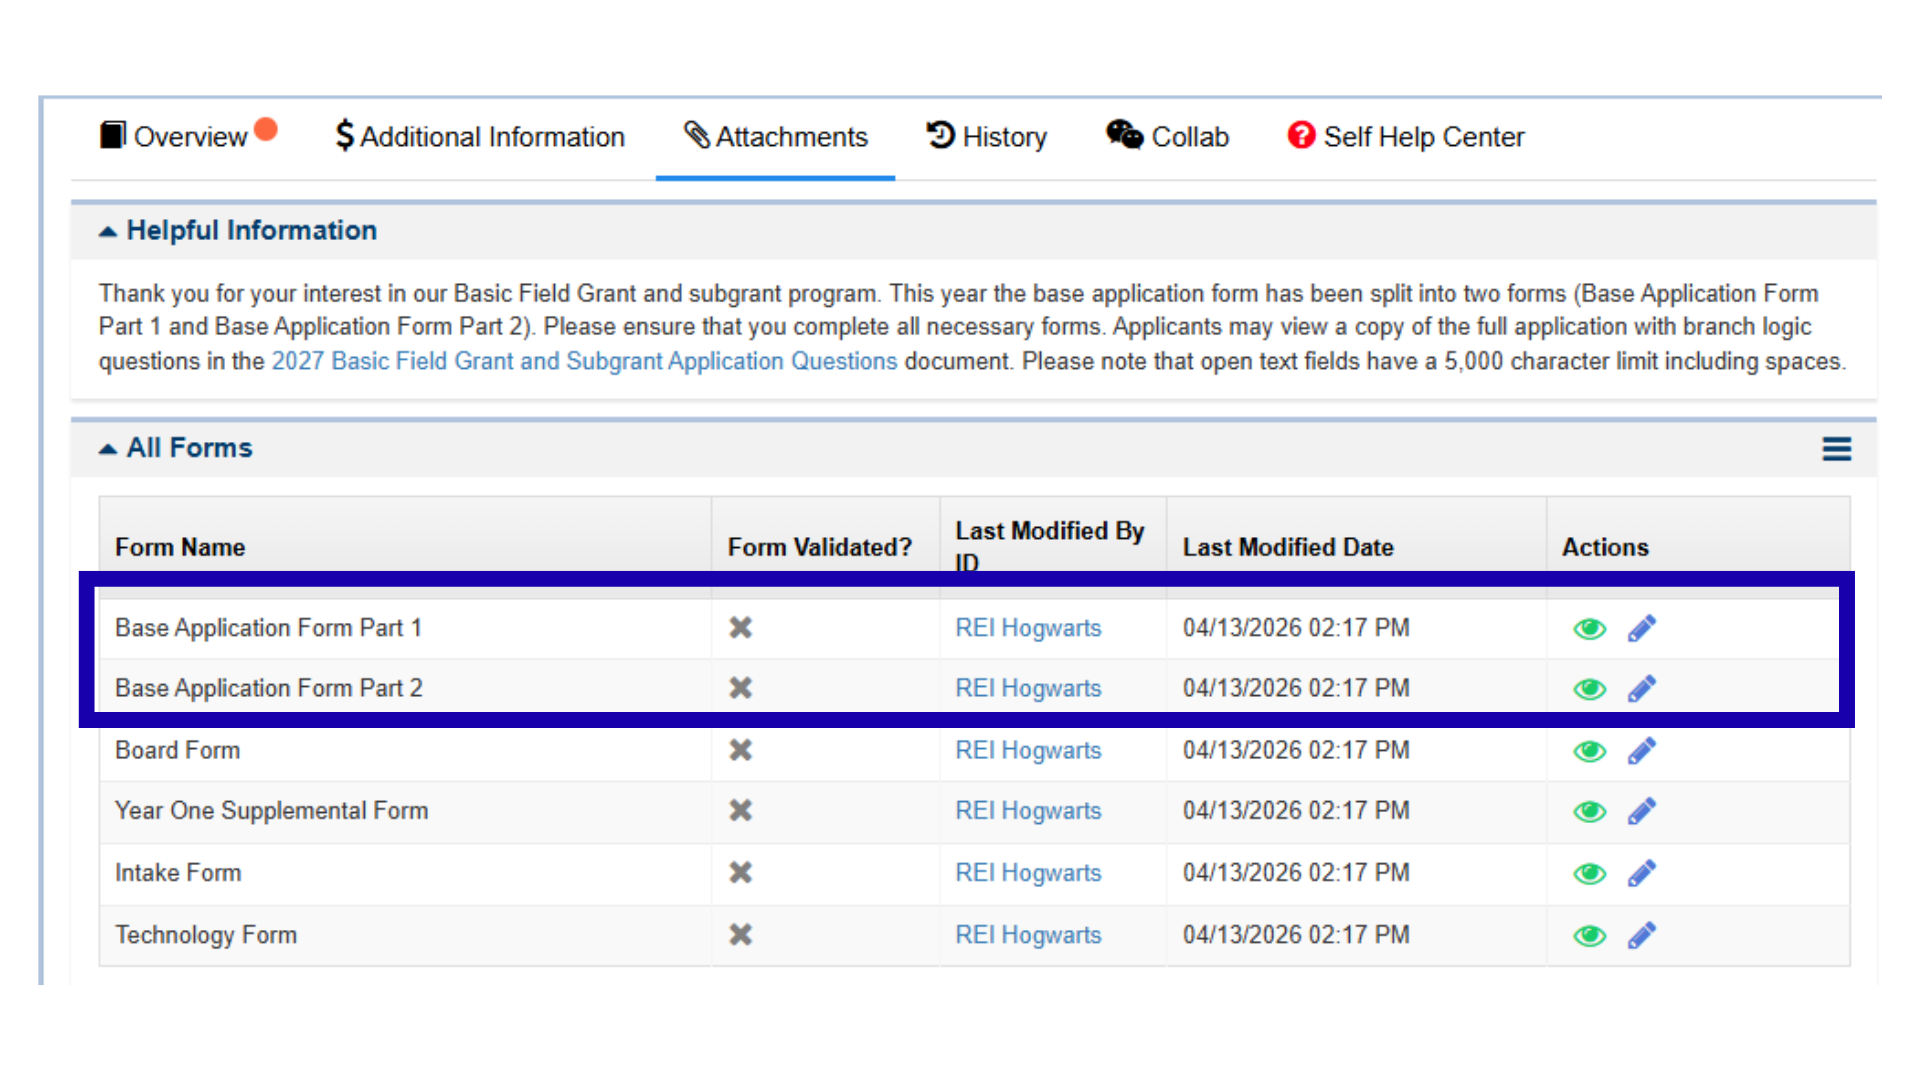
Figure 10: Locating and Selecting the Edit Icon for the Base Application Form
Base Application Form 1 is divided into two tabs: Planning and Service Delivery and Staff Oversight. Base Application Form 2 is not divided into tabs.

Figure 11: Image of Base Application Form Part 1
Completing the Tabs of the Base Application Form
There is no requirement to start any one tab before another. However, when users begin one tab, such as Planning and Service Delivery, they must fully complete it in the order the questions appear.
Figure 12: Image of the Base Application Form Planning and Service Delivery Tab
PLEASE NOTE: Within each tab, there are multiple sections. Users may select the arrow to collapse or expand the sections and show only one set of questions at a time.
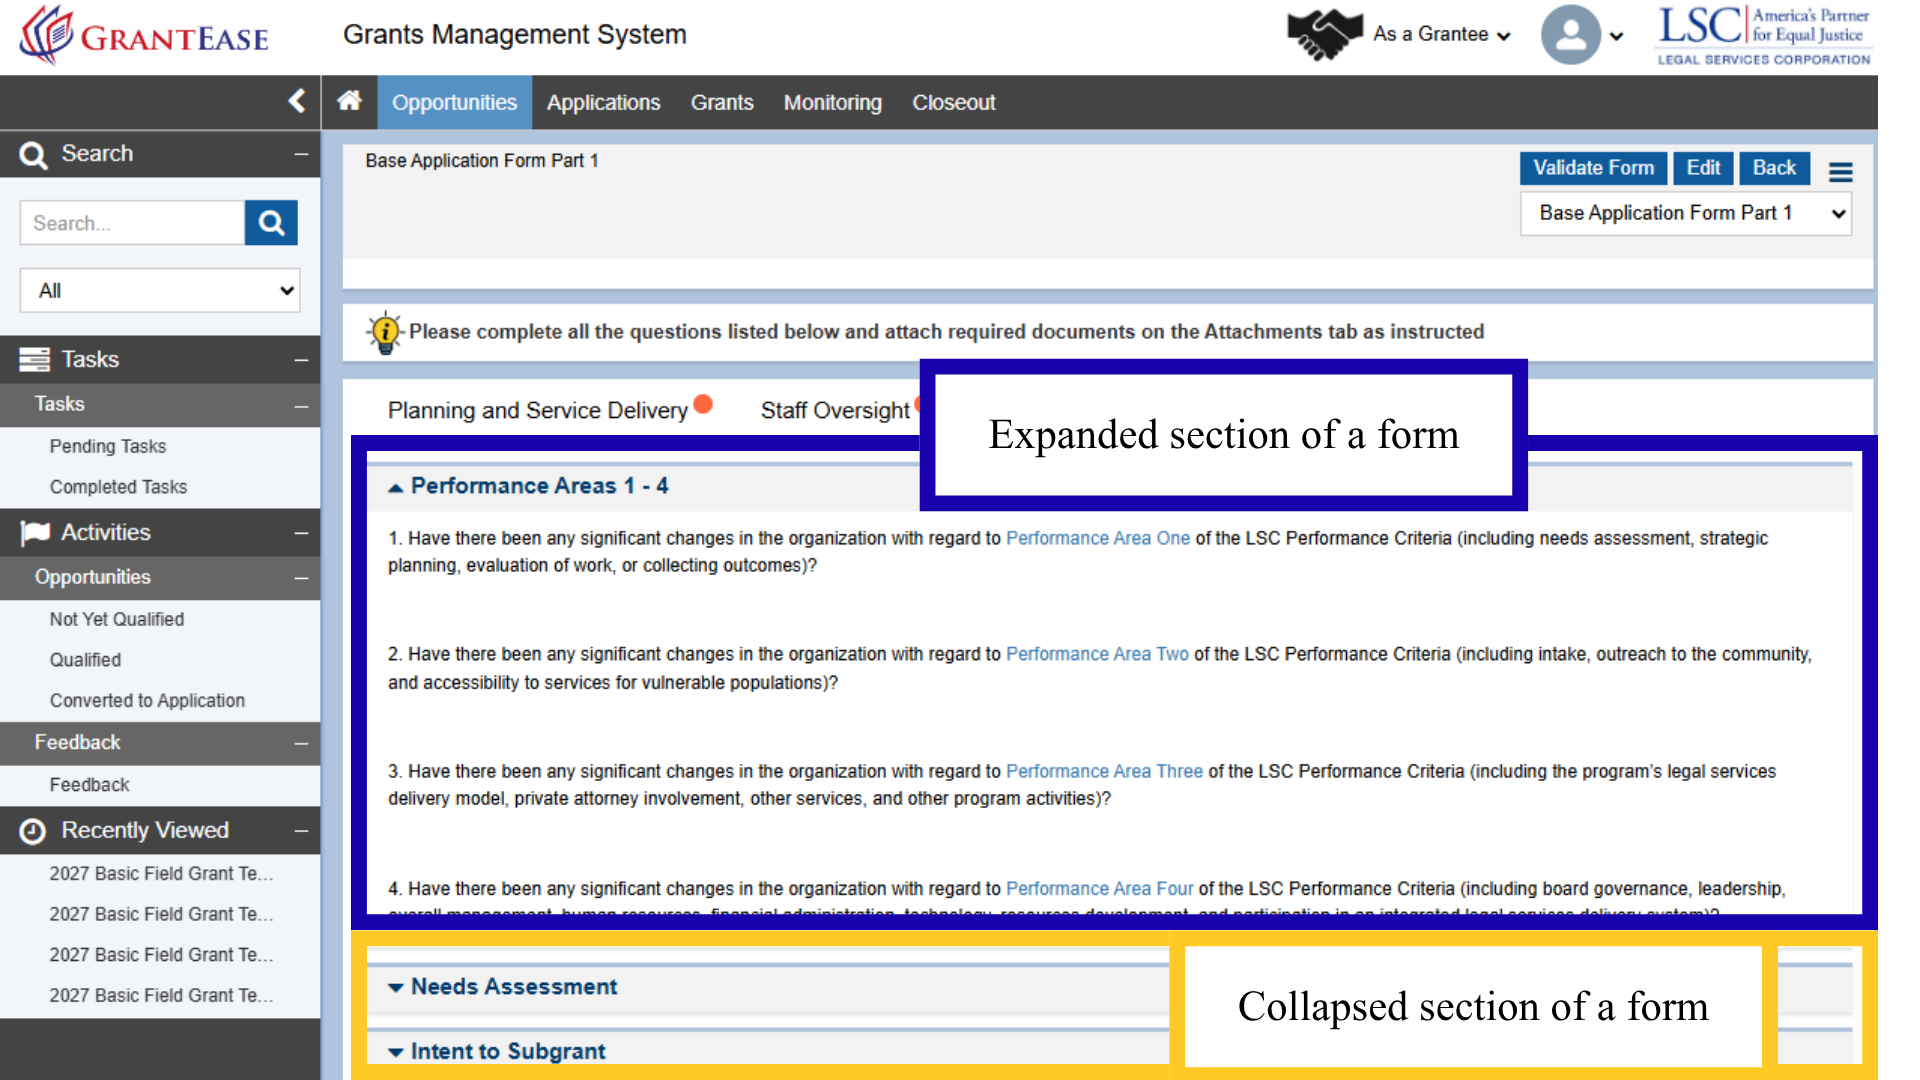
Figure 13: Image of the Expanded and Collapsed Service Delivery Tab Sections
One of the most significant differences between the Base Application and the Pre-Application is that users need not complete the entire application in one sitting. Users may complete a few questions and come back to the form later. To ensure the information entered is saved, users are strongly encouraged to save every time they answer a question or set of questions in the Base Application form.
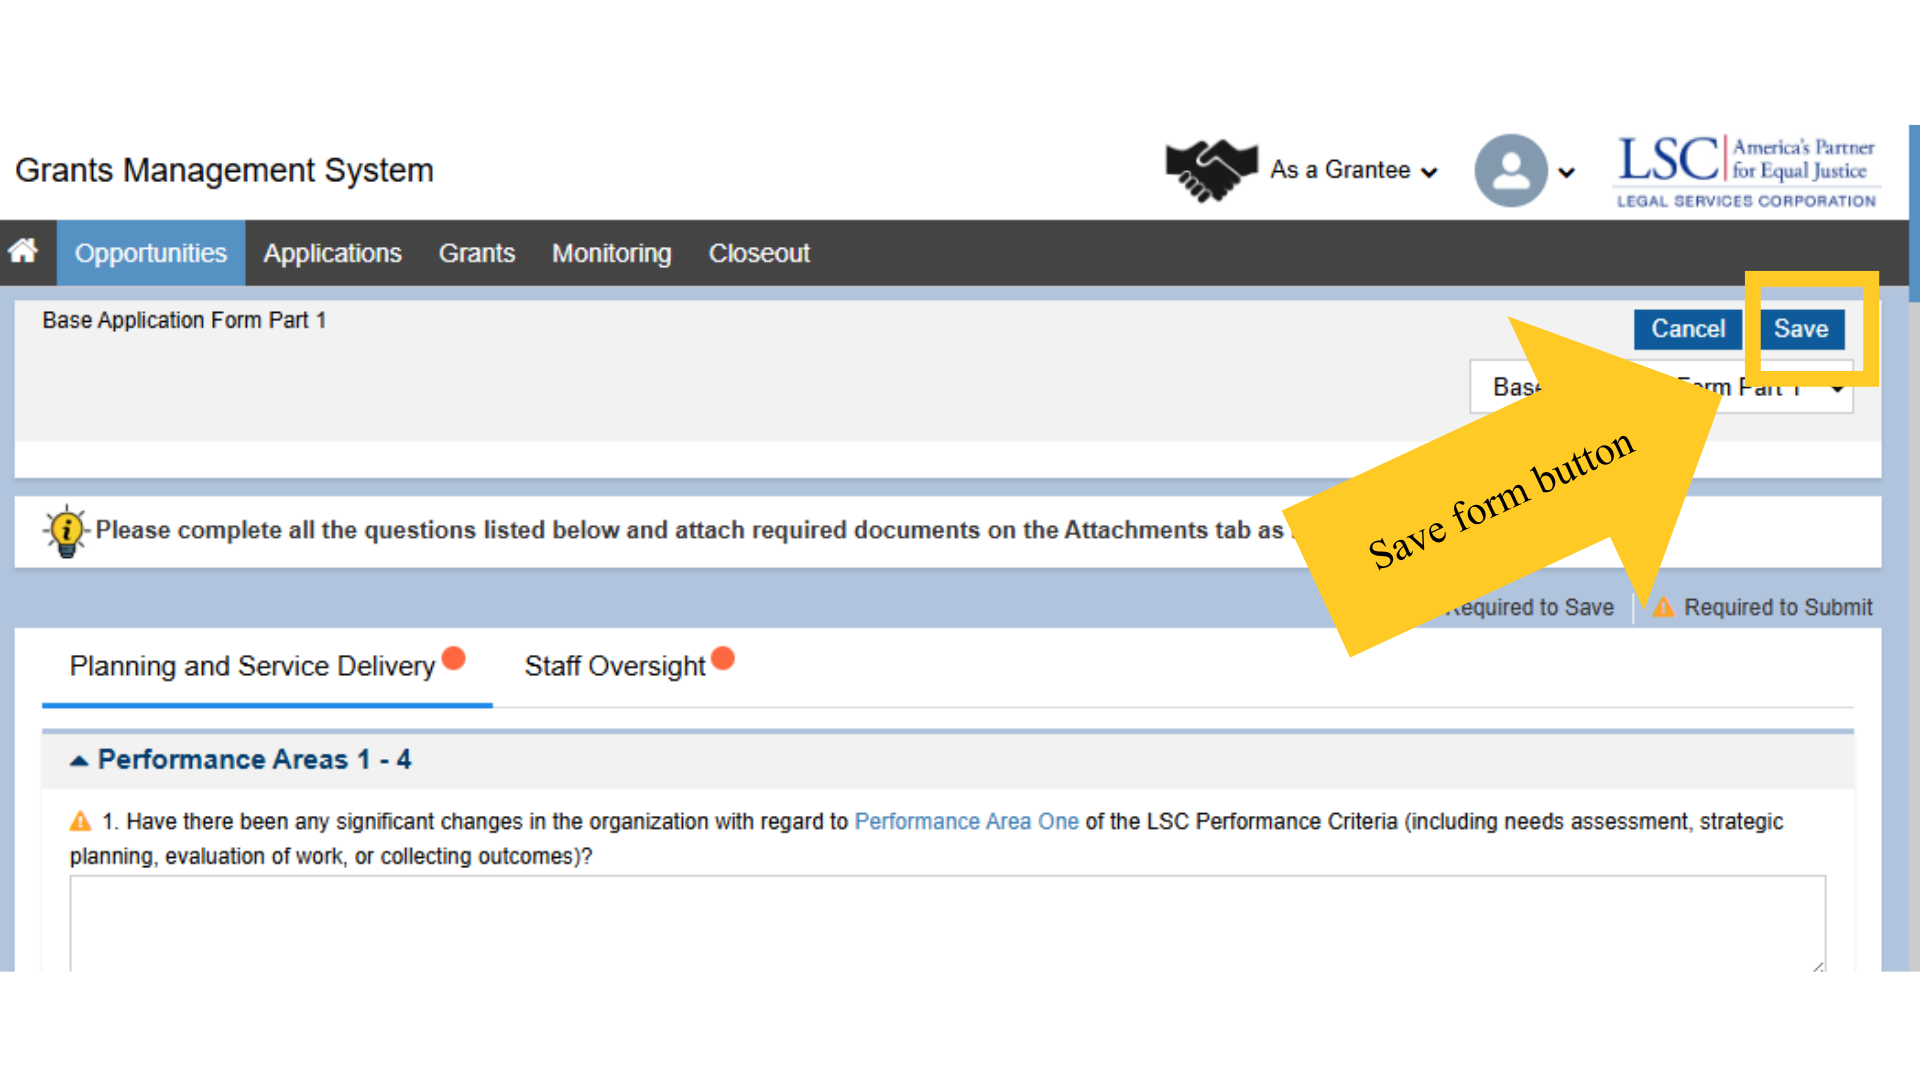
Figure 14: Image of Saving a Section of a Partially Completed Form
Additionally, users should note that GrantEase does not spellcheck a document. Thus, it is imperative that users find an external source to spellcheck their narrative answers. For example, users may want to install a software program like Grammarly. If users are interested in receiving information or training resources on these tools, please visit the LSC Training landing page.
After checking that all answers are grammatically correct, LSC recommends that users also correct any skipped questions, then save when complete.
Questions marked with a red asterisk (*) are required, and all the formats of the responses are explicitly stated next to each question.
Supplemental Questions
Supplemental questions will appear as the conditions of a form change. For example, if a user answers “No,” to question number 35. Does your organization currently employ or contract with family members or close friends of other employees, management, or the Board of Directors? they will move to question number 36.
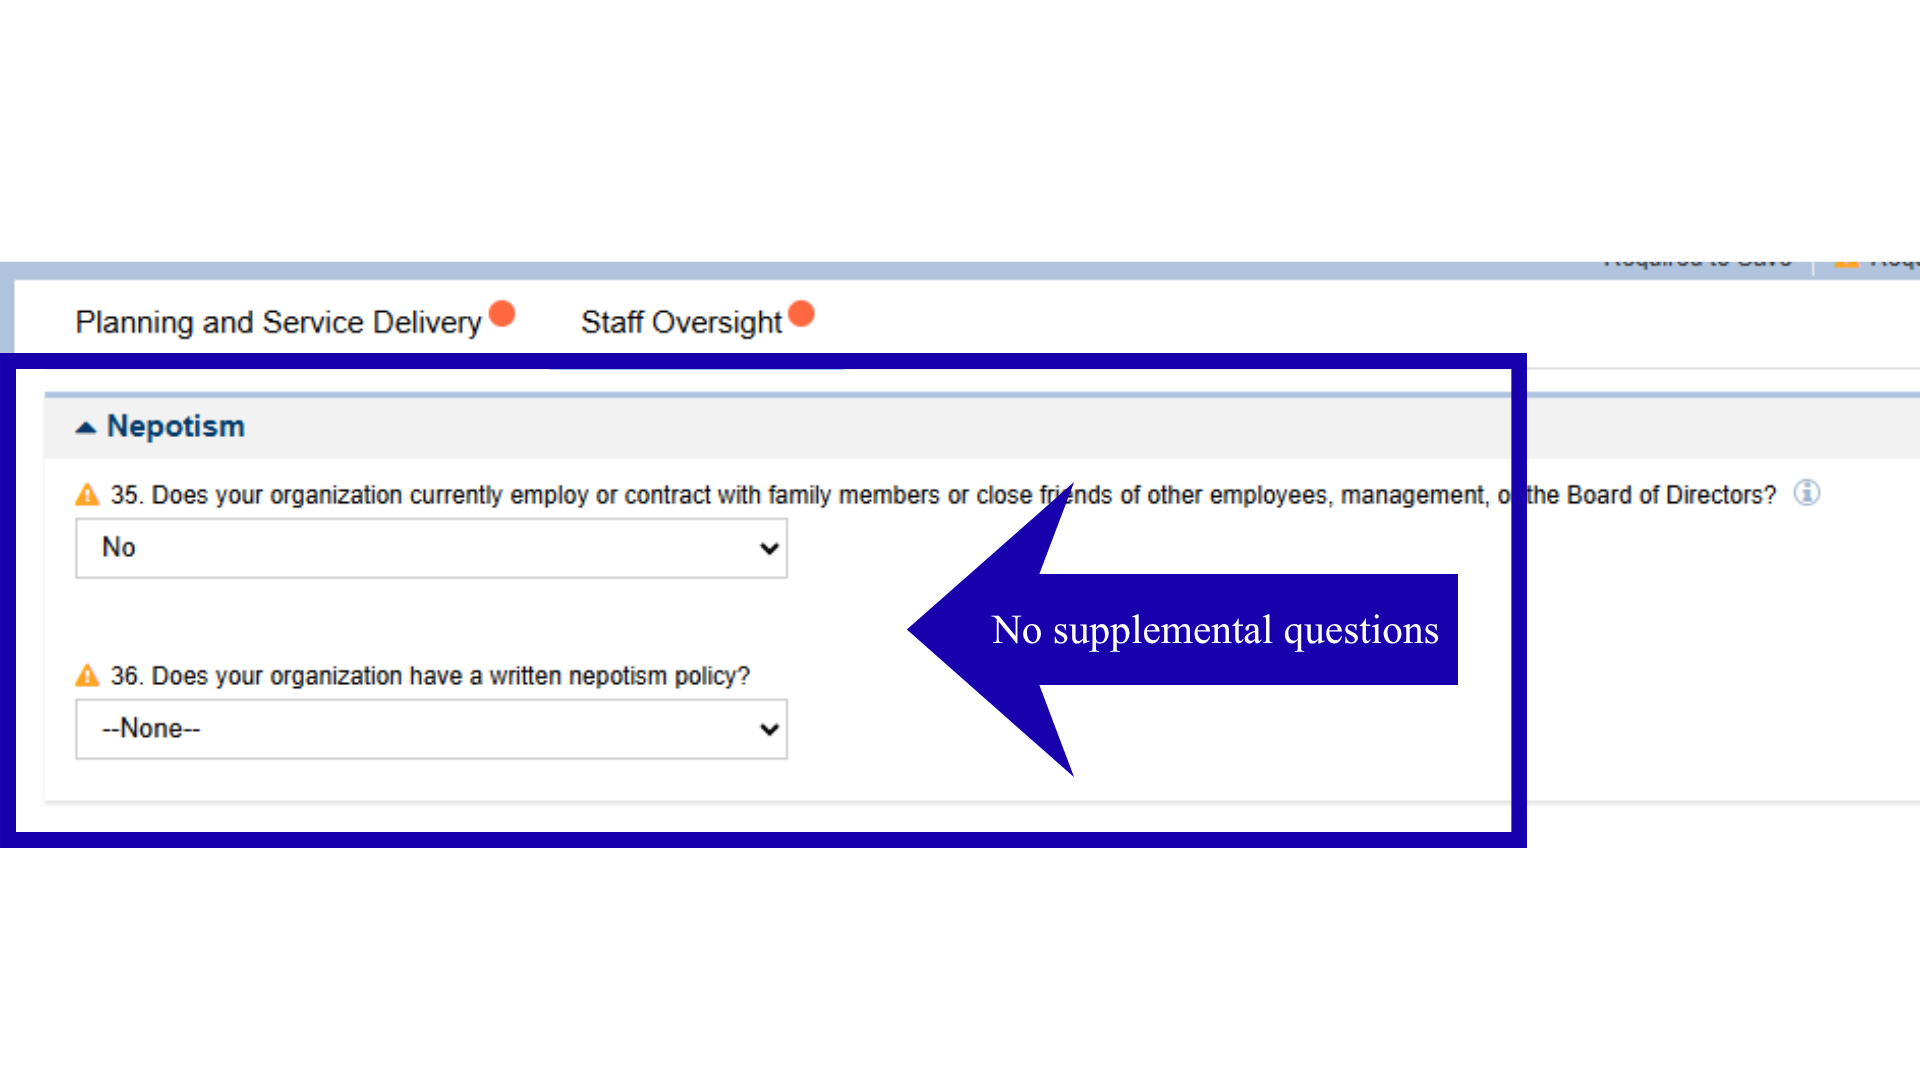
Figure 16: Image of a Required Question Response with No Supplemental Questions
However, if a user answers “Yes,” they will be required to complete supplemental questions (35.1, 35.2, and 35.3). As mentioned earlier, users are encouraged to save each time a change is made in a form.
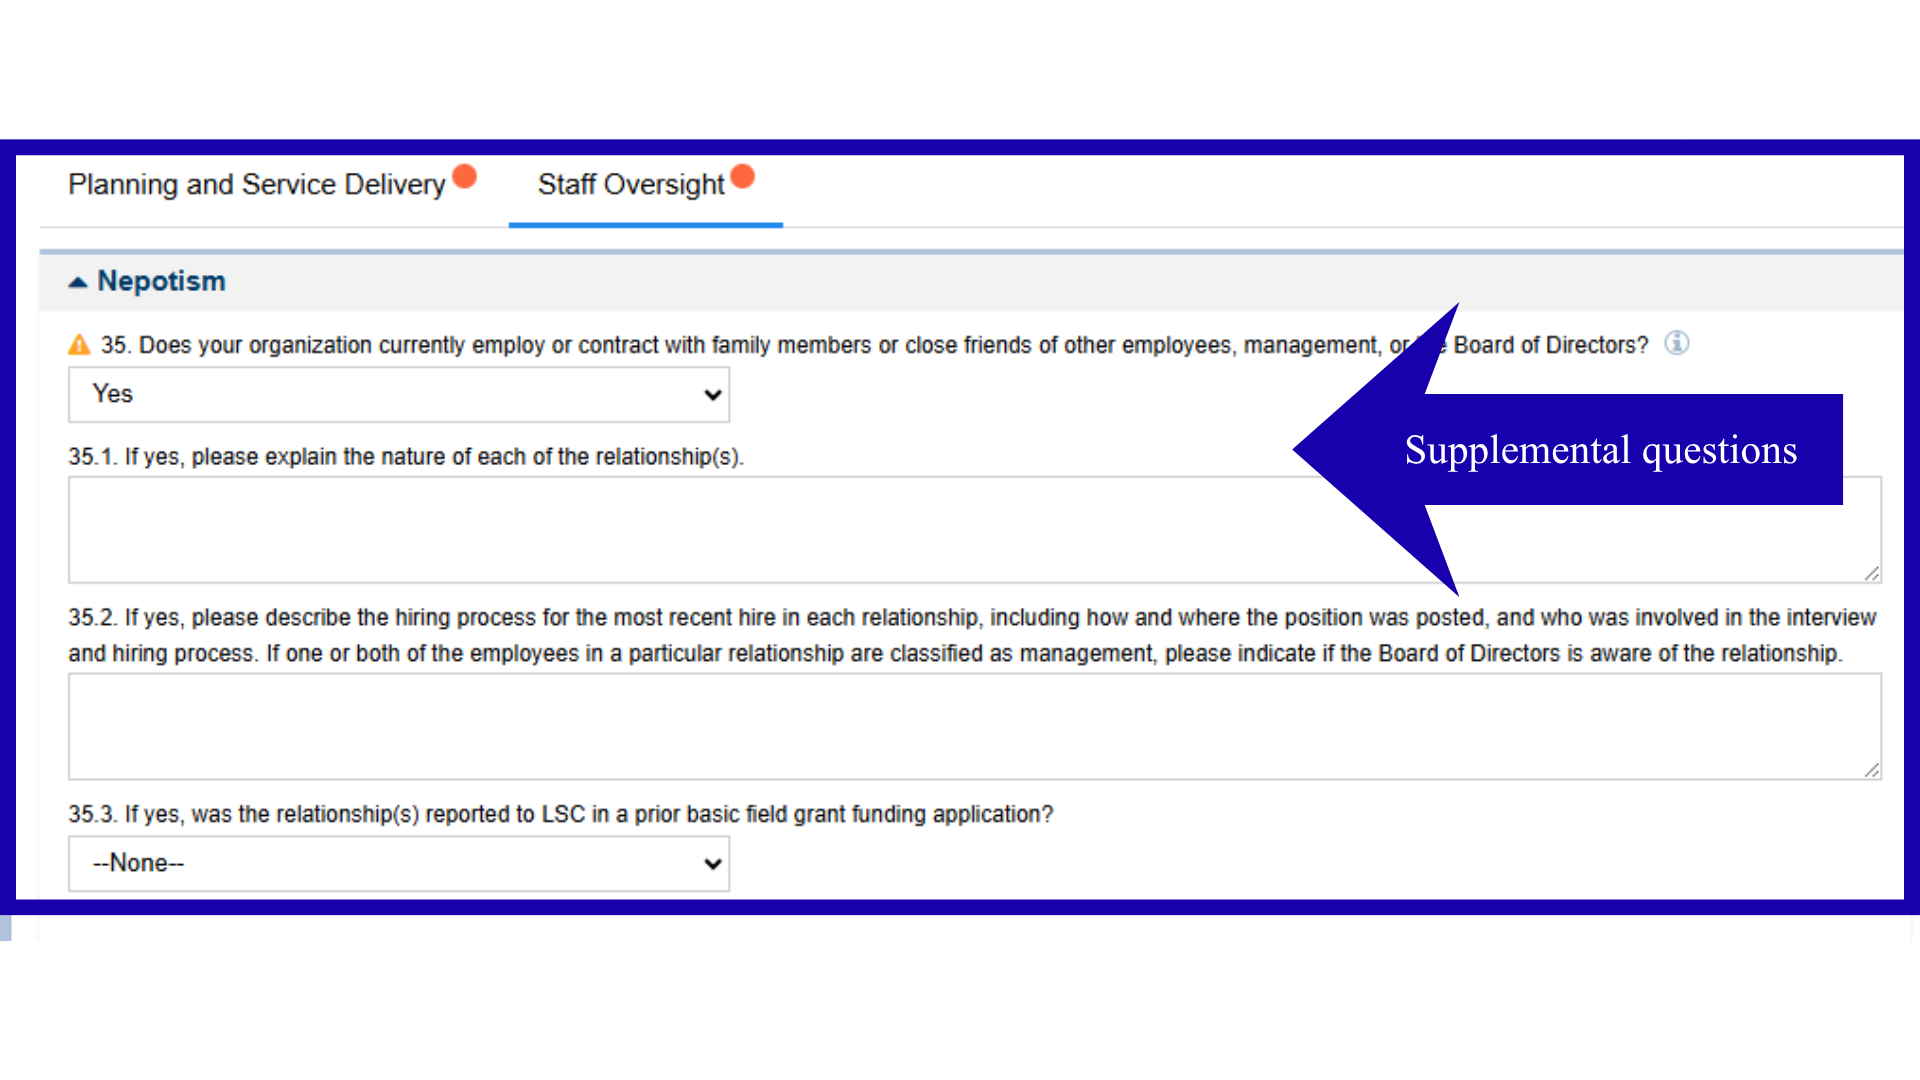
Figure 17: Image of a Required Question Response with Supplemental Questions
Information Table Responses
The responses to some questions require users to complete an information table. If users answer “Yes” to question number 1, that their organization intends to subgrant $20,000 or MORE of LSC funds, they will then be required to complete the Subgrant Application (please refer to the Subgrant Micromodule for steps).
If users answer “No” to question number 20 but answer “Yes” to question number 21, they should proceed to complete the Supplemental Subgrant Organization table.
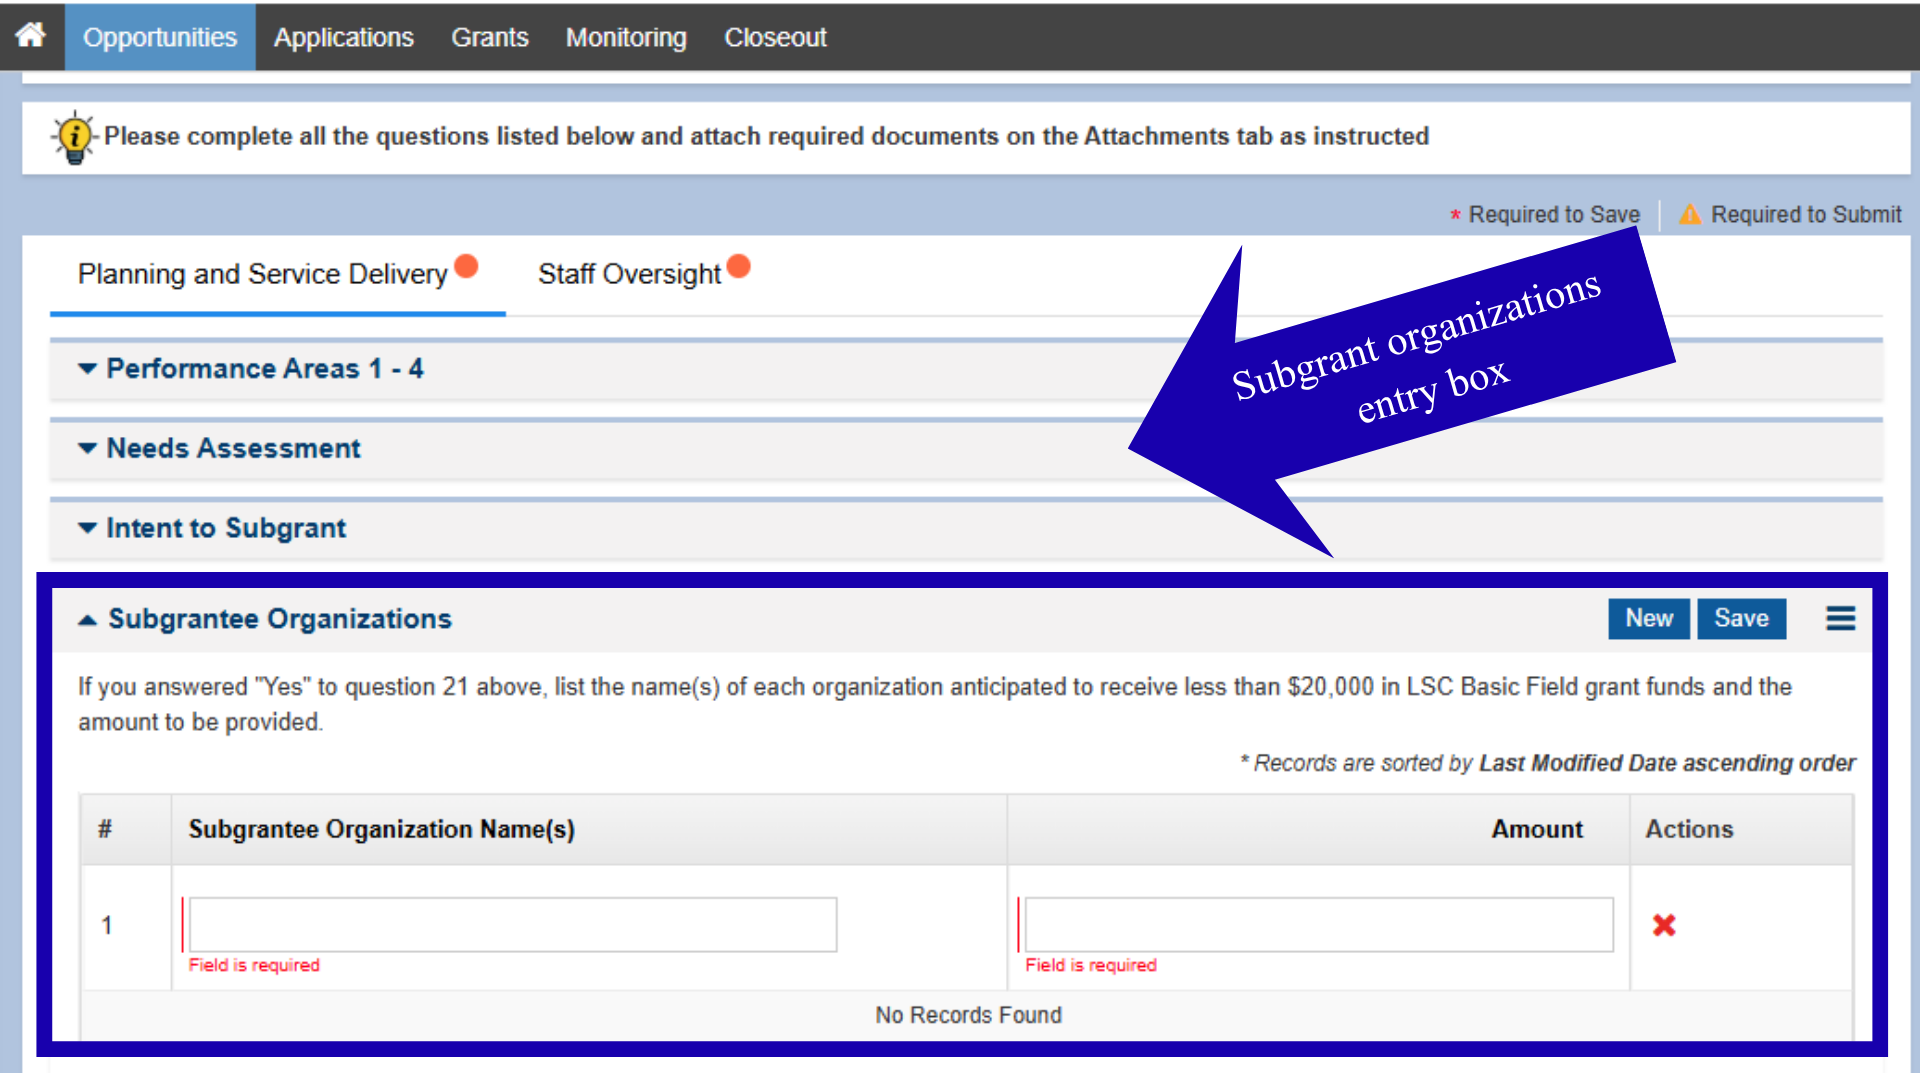
Figure 19: Image of Selecting Add New Subgrant Organization Button
Users will then complete the data entry box with the required subgrant information.
Figure 20: Image of the Subgrant Organizations Entry Box
Uploading Client Success Stories
APPLICATION UPDATE:
Applicants will utilize a Smartsheet link in the Base Application Form to enter their client stories.
PLEASE NOTE: Users must provide a new form for each client story submission.
Users will upload client success stories using the indicated link in the Client Success Stories section of the Base Application Form Part 1.
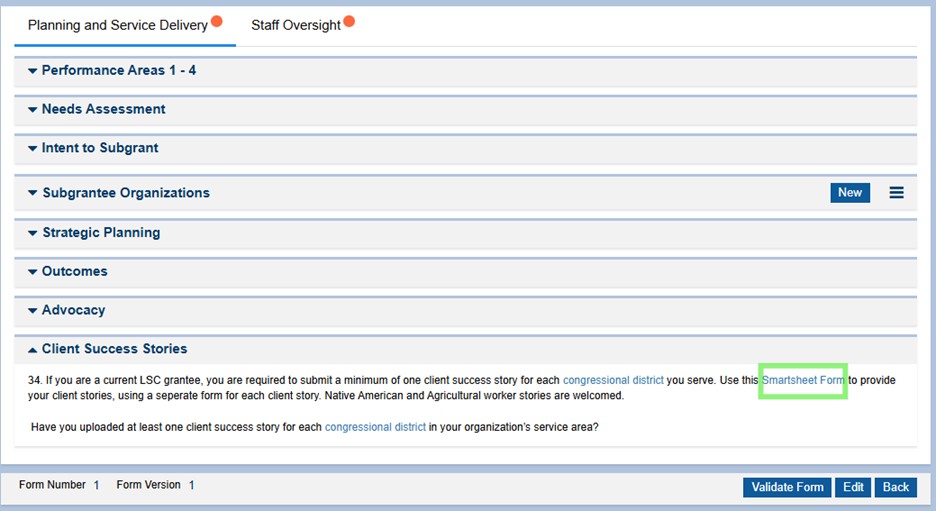
Figure 22: Image of Selecting the Client Success Stories Smartsheet Form Link
A new window will open with the Smartsheet Form. Users should complete each required data field on the form and select save when finished.
Figure 23: Image of Client Success Story Smartsheet Form Window
Figure 24: Image of Saving the Client Success Story Smartsheet Form
After saving each of the required Client Success Stories in a Smartsheet Form, users should acknowledge that they have uploaded their stories by selecting “Yes” from the dropdown menu for the question. Next, users should select the Save button before moving on to other sections in the form.
Figure 25: Image of Confirming Client Success Story Submission on the Base Application Form
Once users have completed the Base Application form (both tabs of Part 1 and Part 2), they must respond to the final question, which asks users to certify that their Grantee Profile information and Documentation are current and up-to-date.
Figure 26: Image of the Accuracy Certification Check Box
If users must leave the application and come back to it, this is fine, as long as the content changed is saved.
After completing, saving, and certifying all tabs in each part of the Base Application form, users should select the Validate Form button on the top right-hand side of the screen. This is a feature in GrantEase that will allow users to see which questions have been skipped or are incomplete.
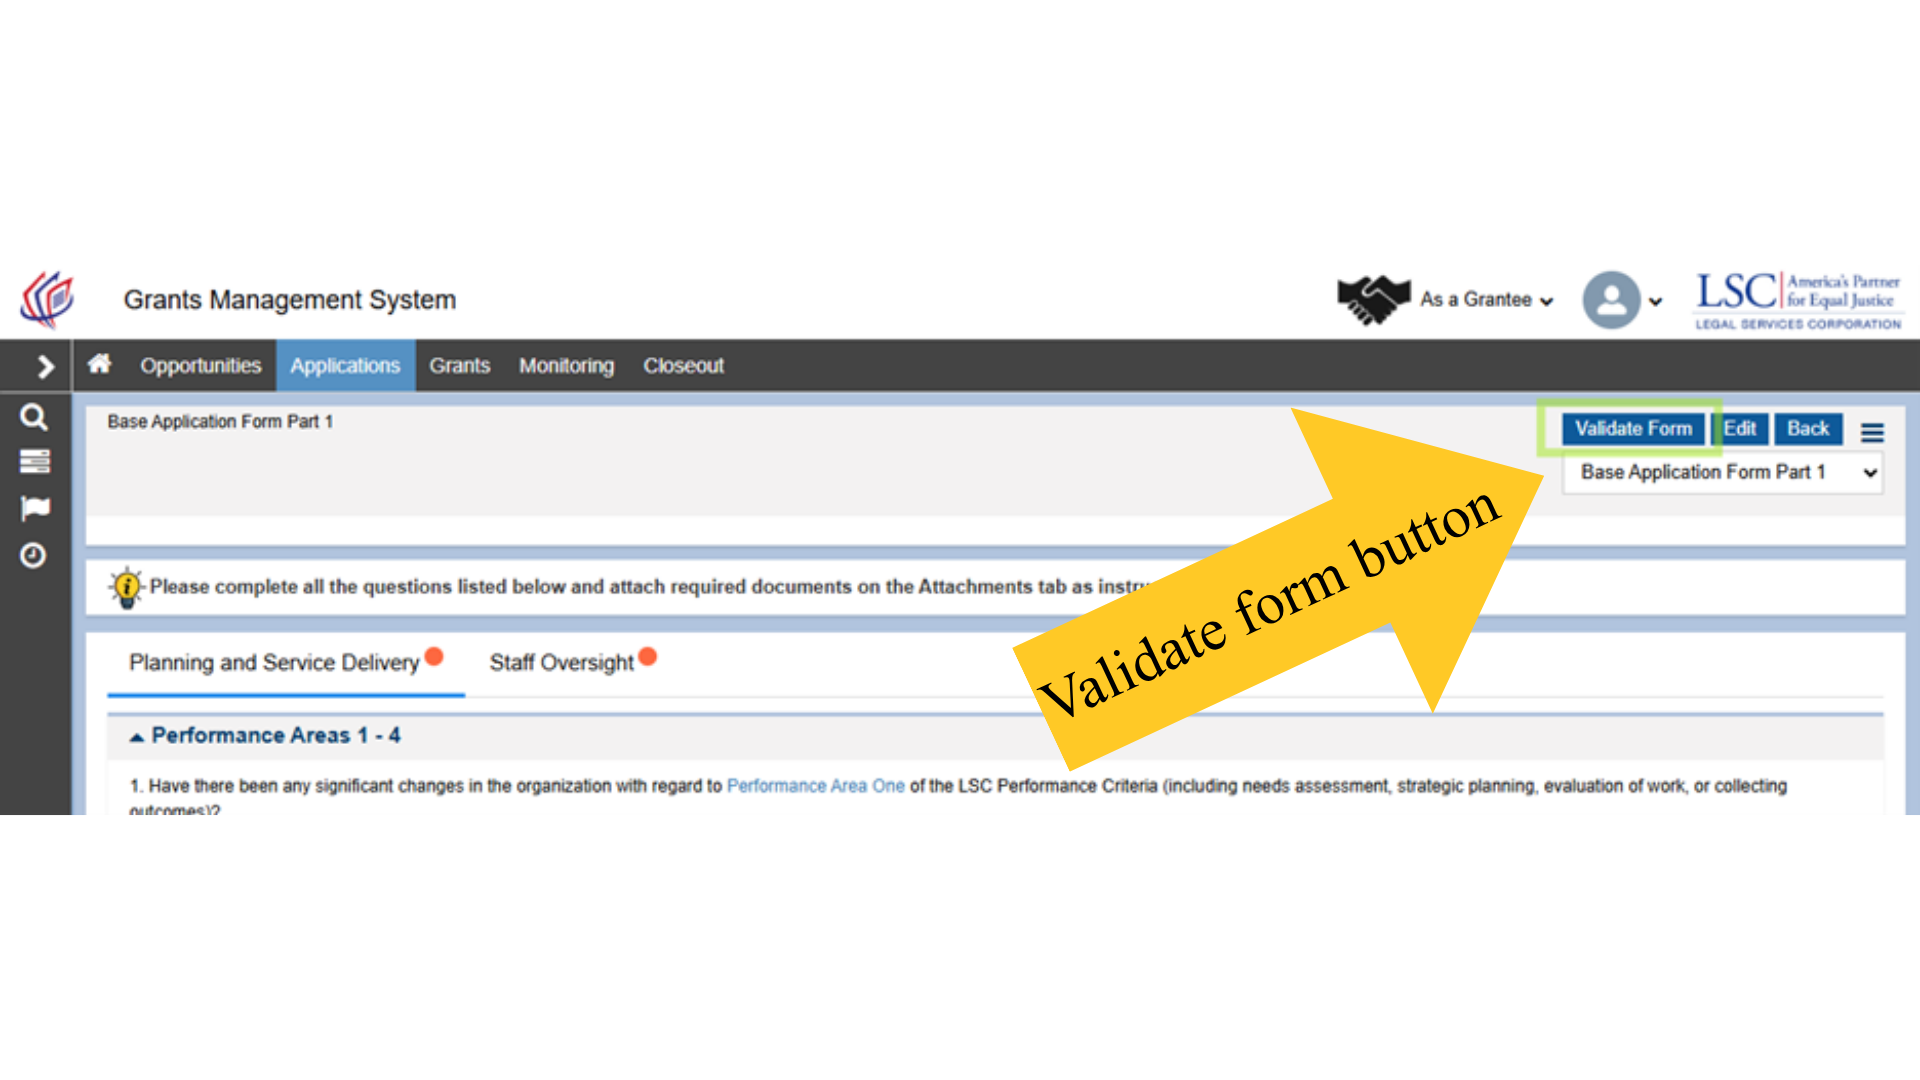
Figure 27: Image of the Validate Form Button
If users receive a Validation Error Message, they will need to go back and rectify these errors before moving on to the next section.
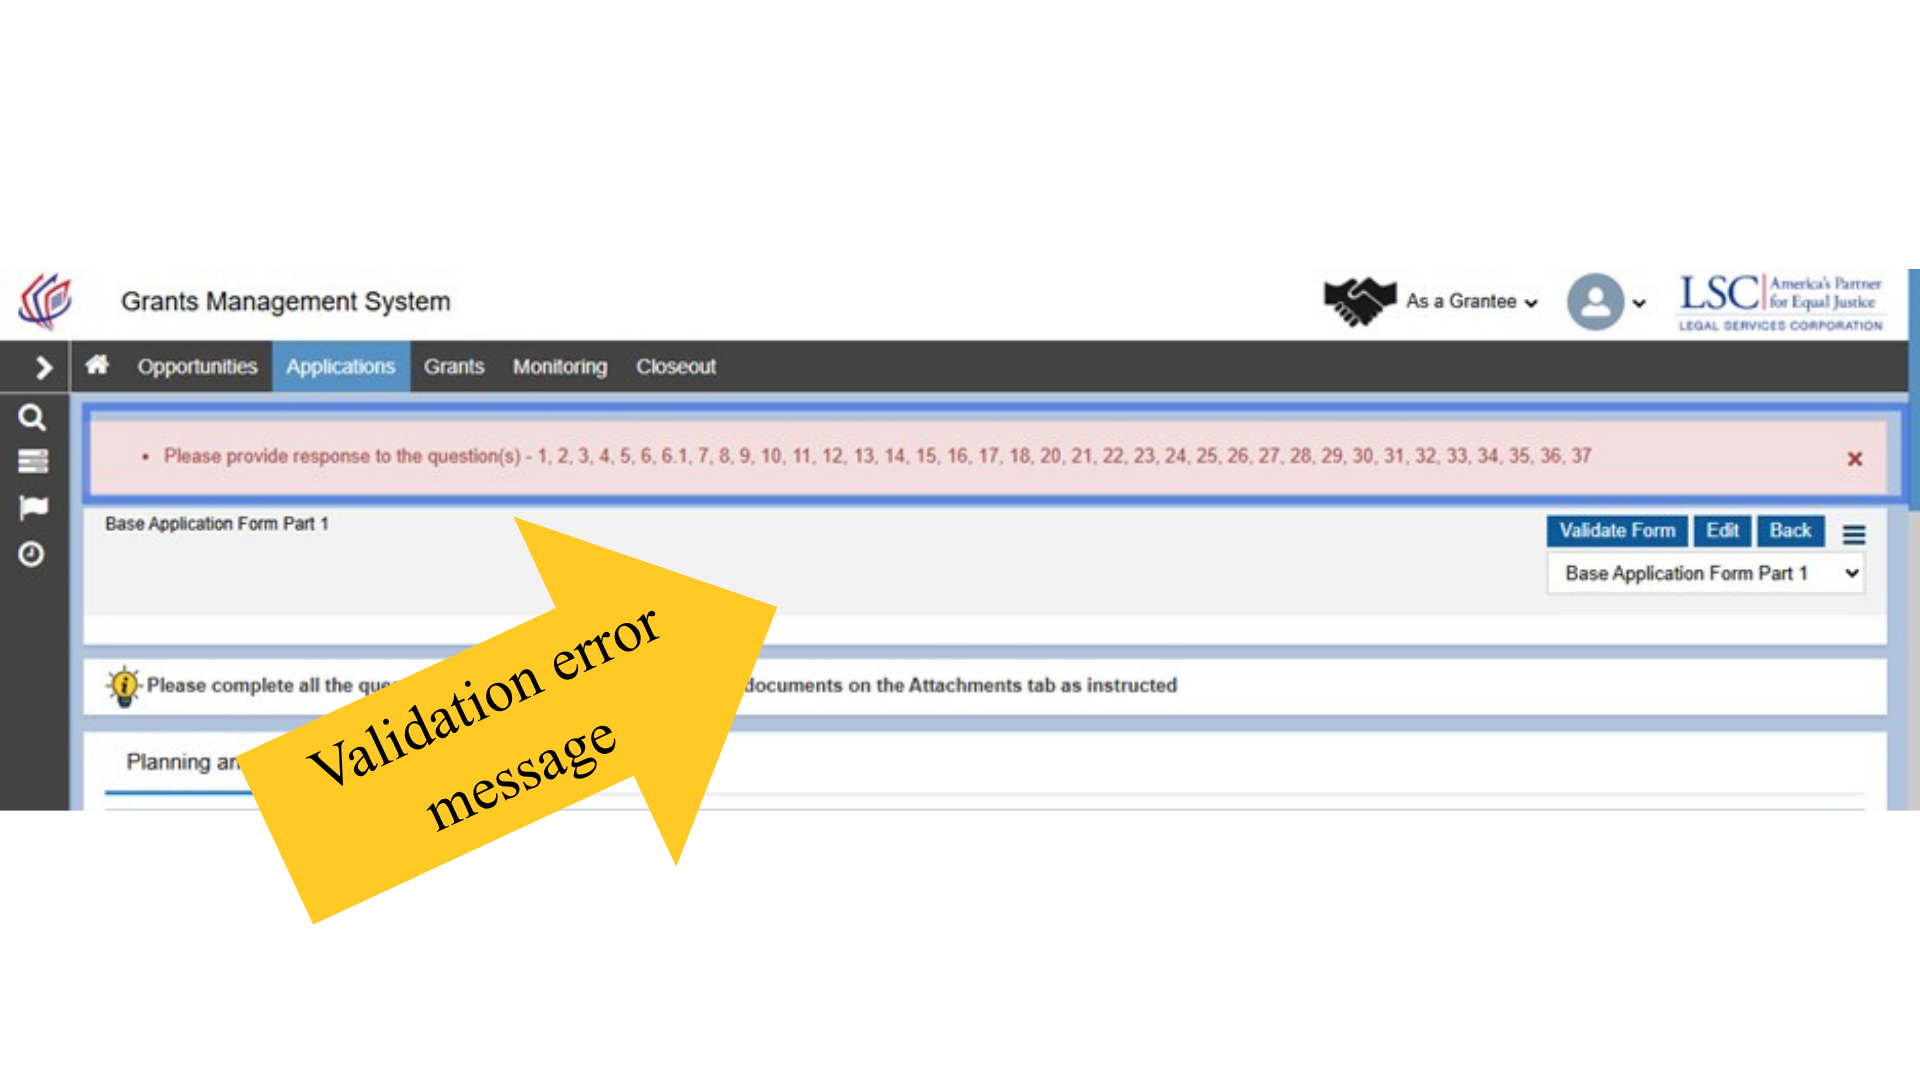
Figure 28: Image of a Validation Error Message
Once the Base Application form is completed and validated, users may select the Back button to navigate to the next form, or users may select the next form from the drop-down menu in the top right-hand corner of the screen and be taken to another form.
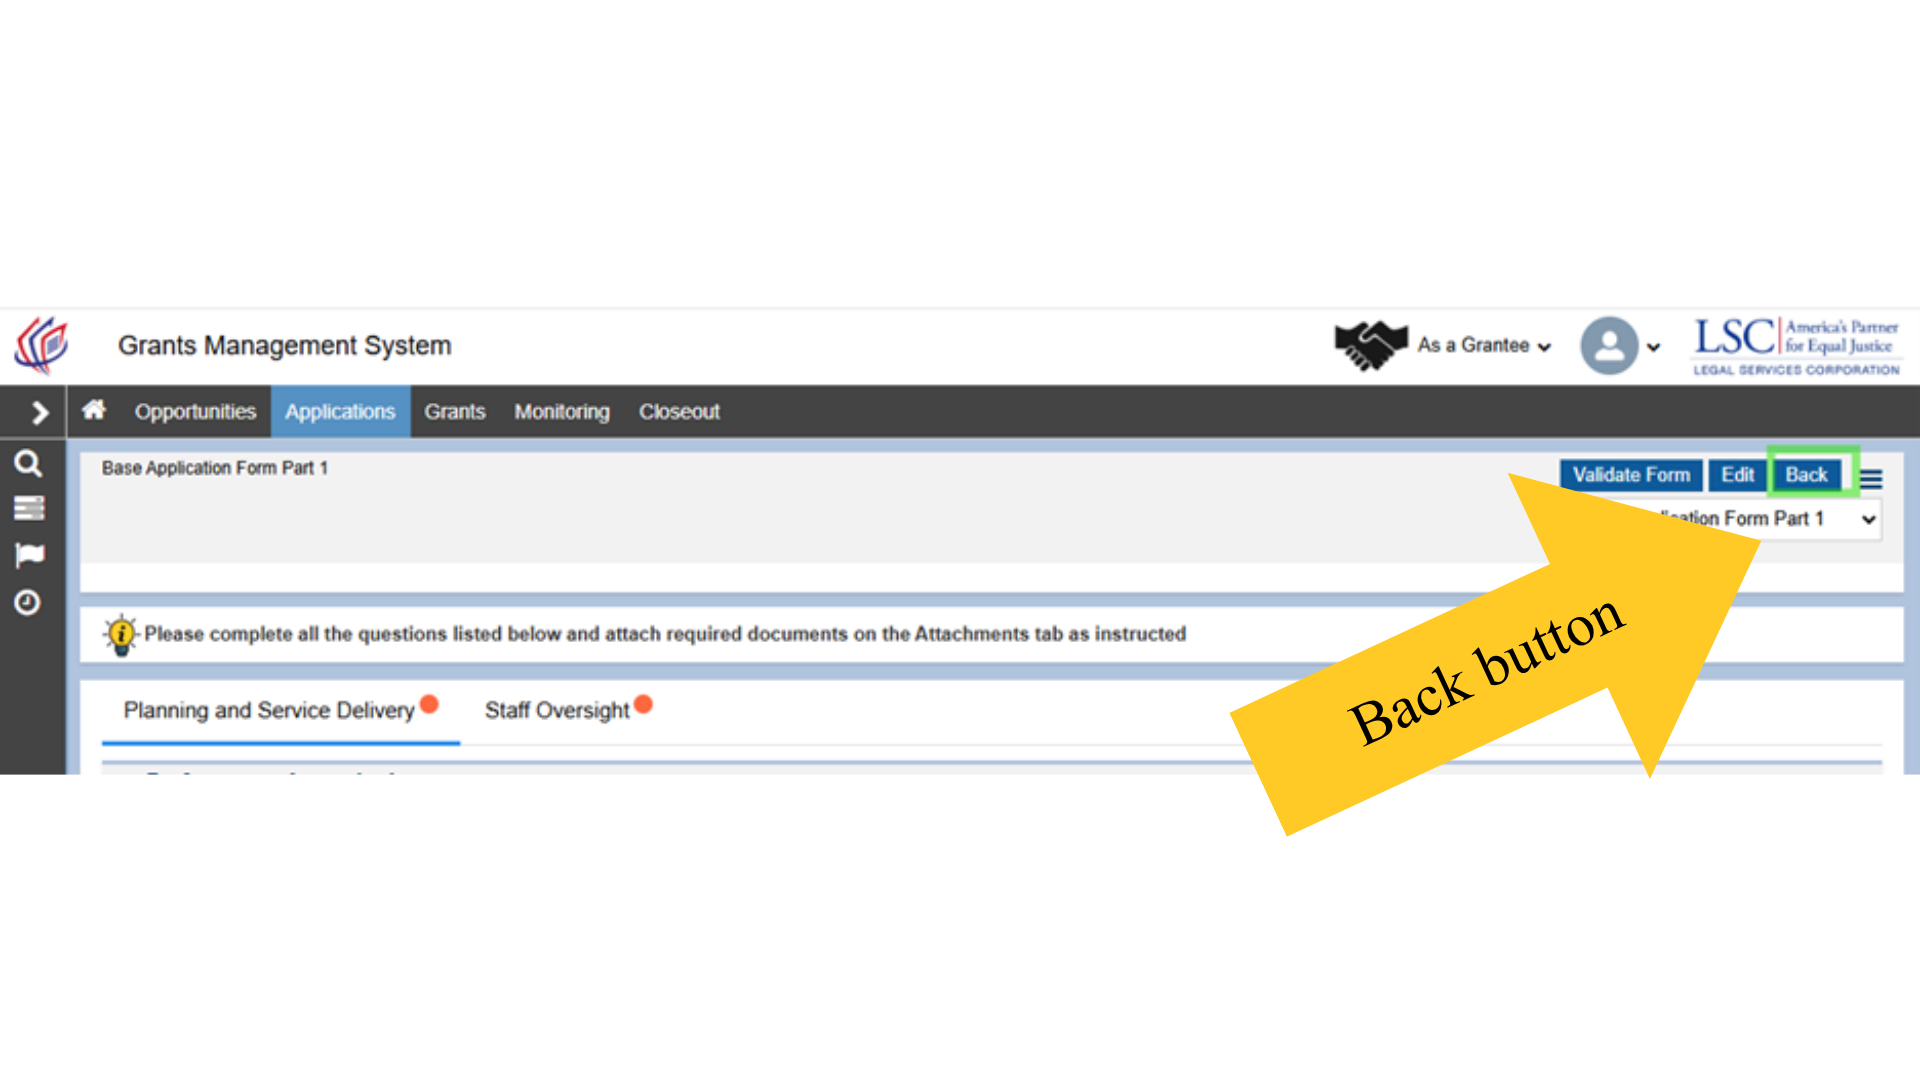
Figure 29: Image of Navigating to the All Forms Table Using the Back Button
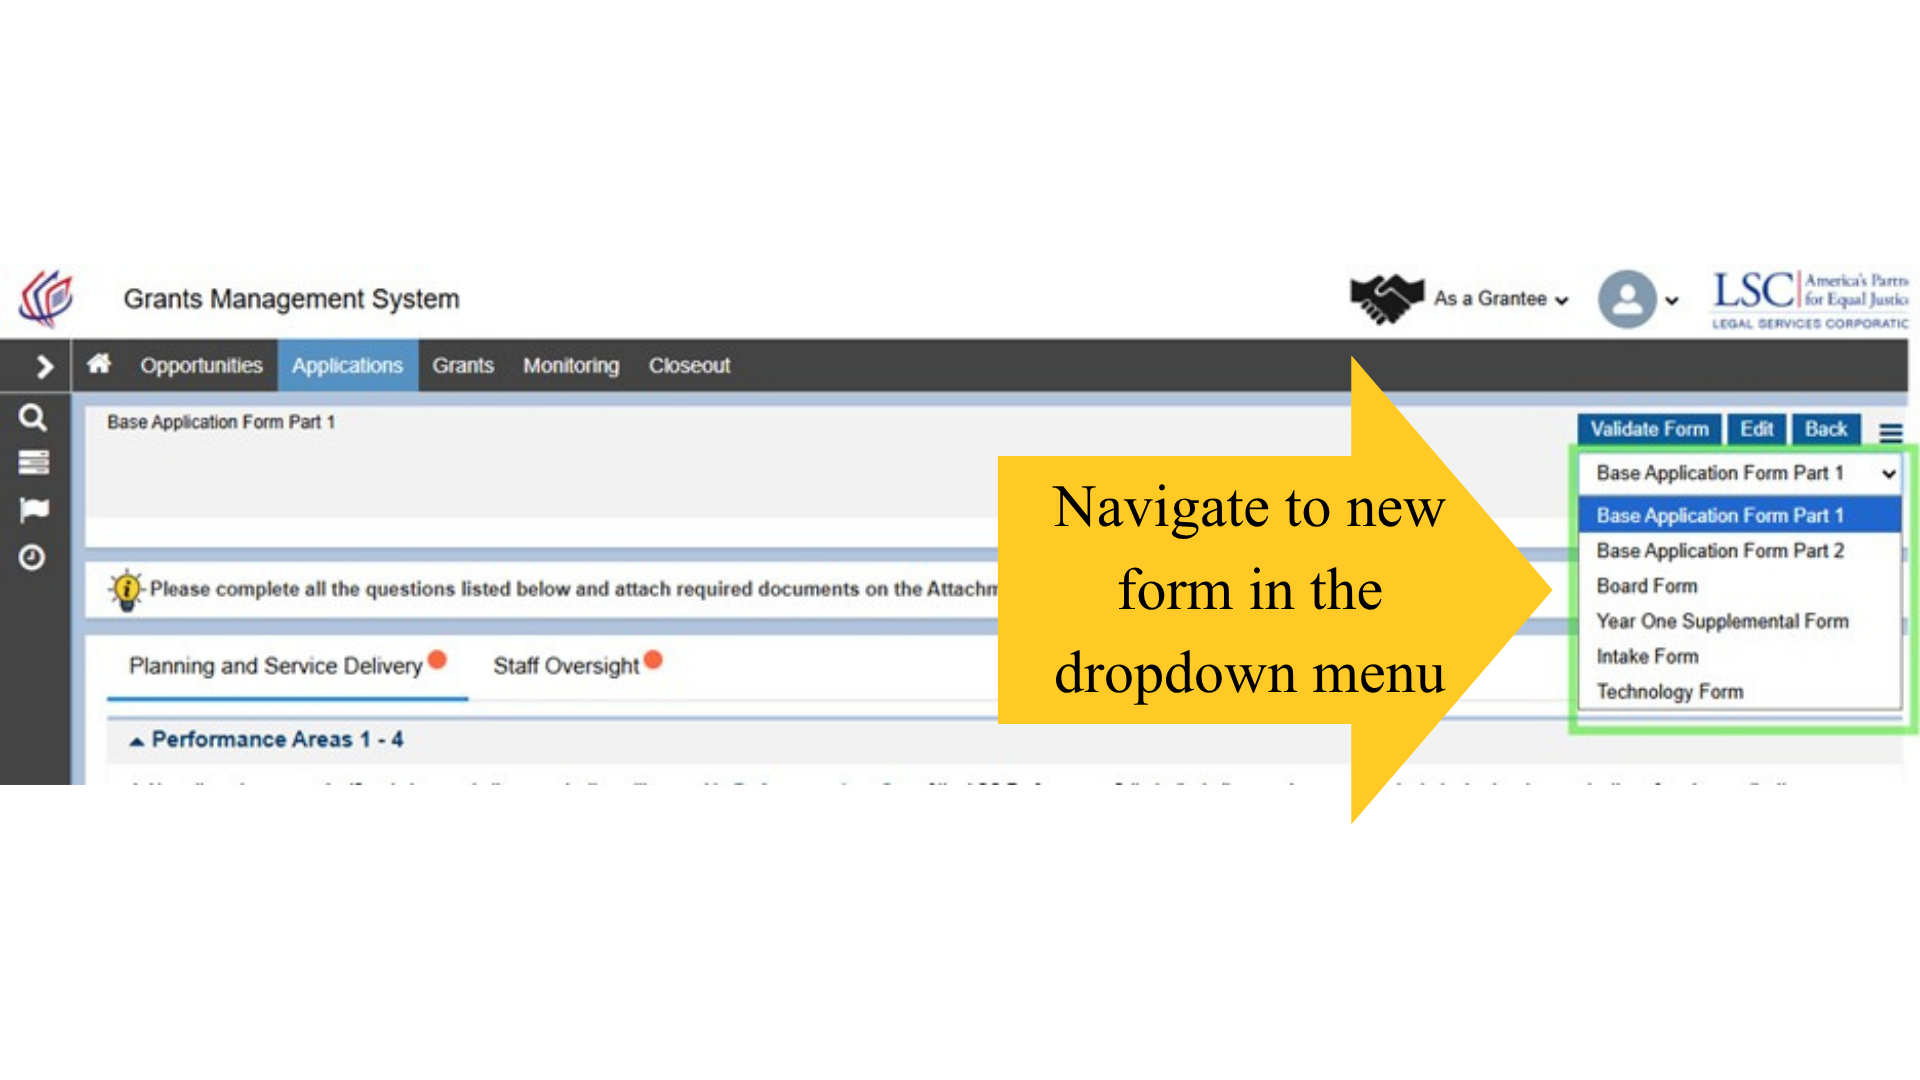
Figure 30: Image of Navigating to a New Form Using the Dropdown Menu